
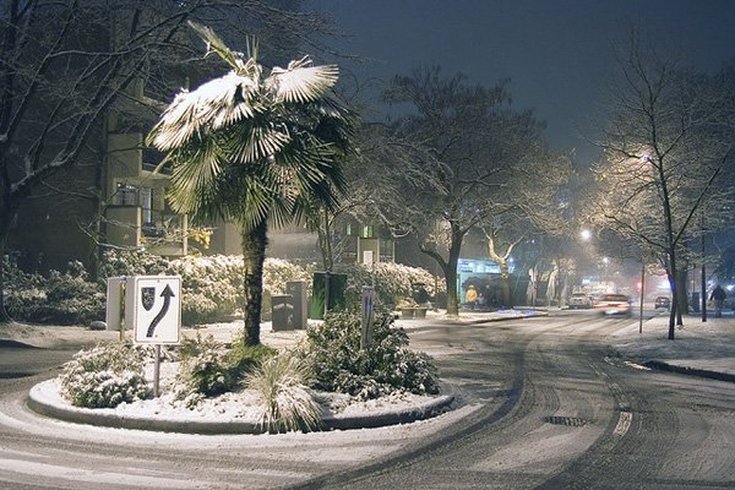
 Welcome to Charleston, where we get...inches of snow? Wait, that can’t be right. Thanks to winter storm Grayson we had our own little winter wonderland. Beautiful as it was, how do you know how much damage it caused your trees and shrubs? Let’s take a look at some signs that your trees and shrubs need some love and attention before they are ready for the warm weather.
1 Comment
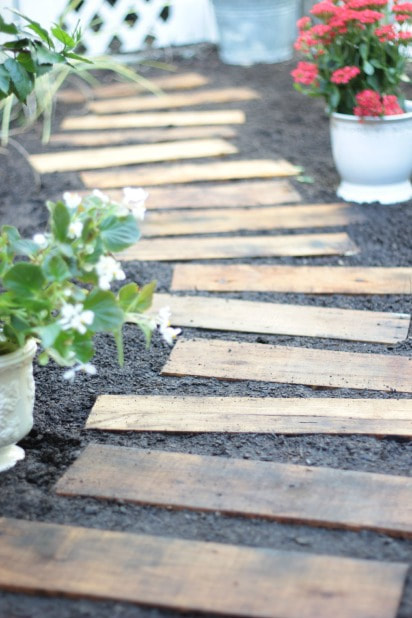
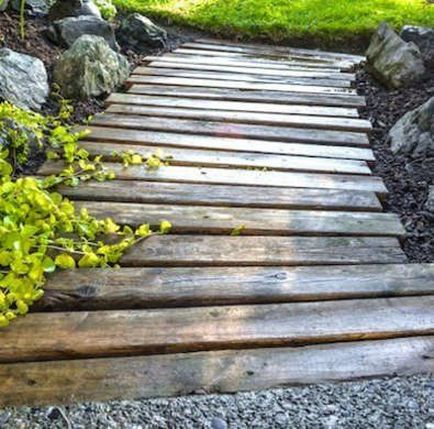
Are you decorating your backyard or garden and looking for an interesting conversation piece or just a fun project you can complete in a day? These ideas on how to improve your backyard landscape are small, easy, budget friendly, and really make a difference! 1. Pallet Walkway
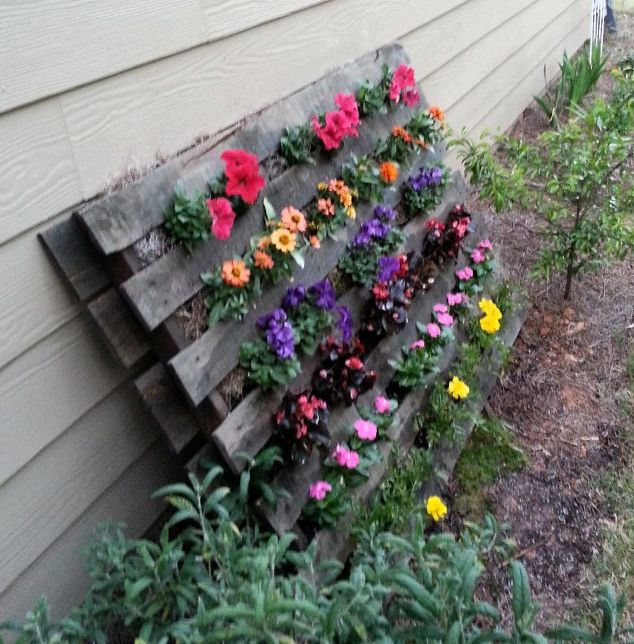
This cute idea is simpler than you think! You can find pallets for free on a variety of sites and Facebook, you can either treat the pieces with a waterproof/outdoor seal or use them bare, but be sure to sand them a bit first! Dig up the earth a bit where you plan to use them and place them as desired. Fill in the spaces with the extra dirt and you’ve added a fun, unique walkway! 2. Garden Bench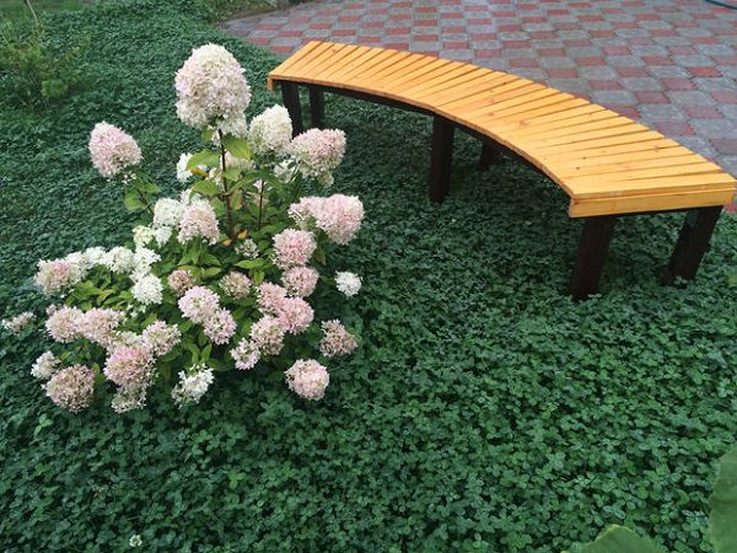 This adorable garden feature can be customized to fit your garden, and the average pricing for this project is around $15. Take a look at this link: http://www.instructables.com/id/Garden-Bench-3/ 3. Pallet Gardening
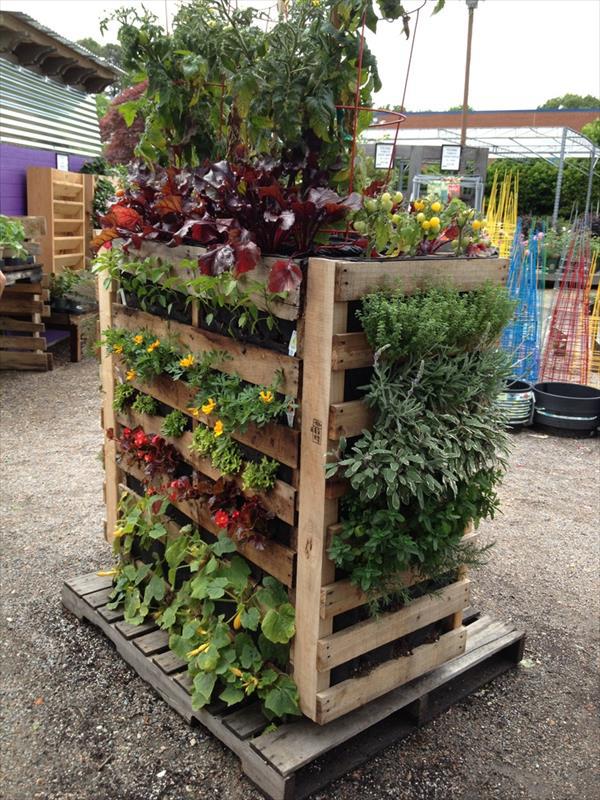
This type of gardening is on the rise and you if you google search for pallet gardening, you’re bound to see many different creative examples! The main cost for this project would be screws/nails to keep the pallets together, gardening cloth, soil, and of course, plants!
The South, known for many things; great food, hospitality, humidity and palm trees. Though one thing not usually noted about the south are vibrant Fall colors. To enjoy anything like this we usually need to take a drive up I-95 to enjoy the beautiful hardwood trees and all their crayola-esque glory atop mountain and hillsides of the Appalachians. Our landscape is dominated mostly by tropicals, evergreens and Spring/Summer blooming flowers. This doesn’t mean however that you can’t enjoy/plant something to give yourself a fall treat….a fall treat that lasts longer than a Pumpkin Spice Latte that is. Virginia Sweetspire – Zone 5-9 This shrub is great for beginners due to how tolerant it can be toward soil type and drainage issues. It is extremely easy to grow and produces a purple-red foliage in the Fall. The Virginia Sweetspire is best suited for partial sun/partial shade and moist soil and needs to be watered often. It looks great planted in a natural garden among our Southern Azaleas and Camellias. 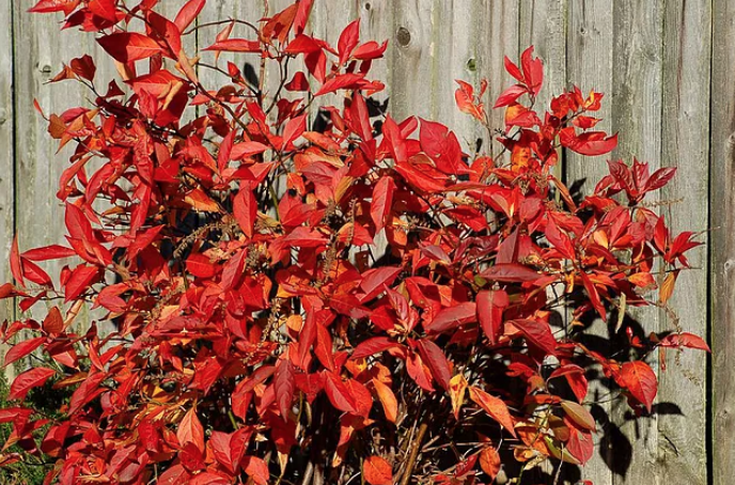 Oakleaf Hydrangea – Zone 5 – 9 Like most hydrangeas, the oakleaf hydrangeas require some sun and well-drained soil to thrive. They are easy to grow in places with hot summers making them a great choice for our area. In addition, once established, they are drought resistant and virtually disease and pest free. Keep in mind when choosing a spot for your oakleaf that they grow to be 10’ tall with an 8’ spread. 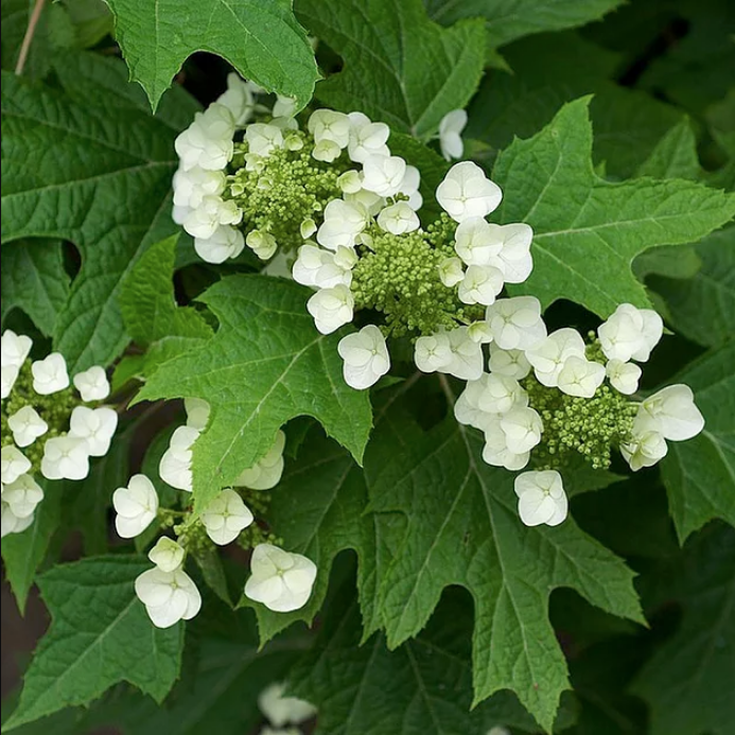 Beautyberry – Zone 4 – 9 The Beautyberry is a shrub known for its tightly clustered purple berries. It grows quickly and should be planted in light shade and well-drained soil. They can endure short droughts but prefer at least an inch of rain, or water of some sort, a week. 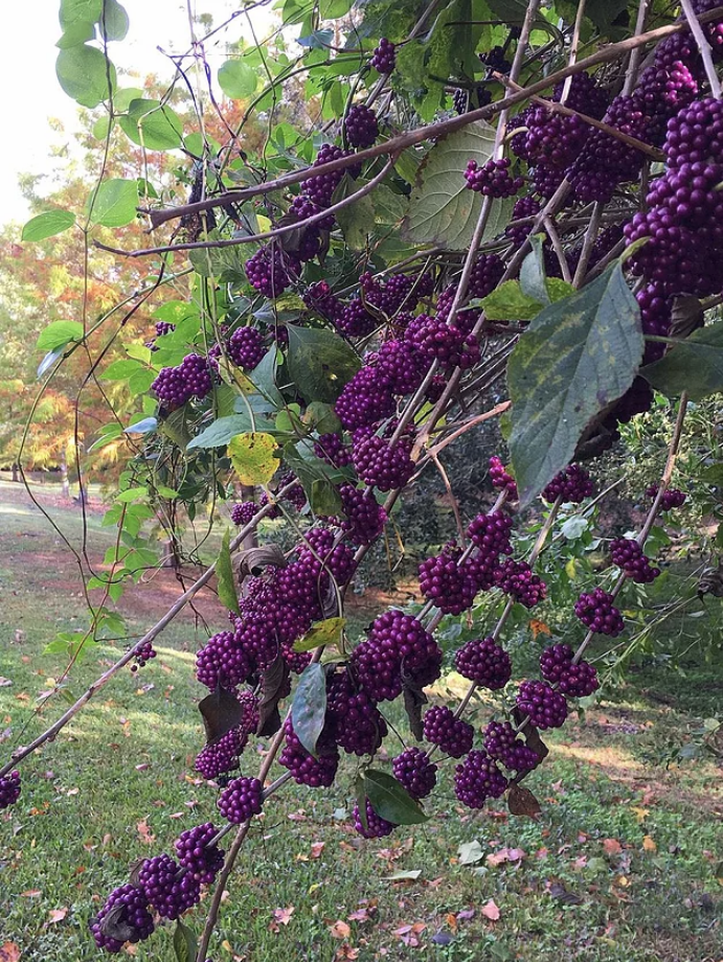 Tuliptree – Zone 4-9 The tallest of the eastern hardwoods, this fast-growing tree is recognizable by its tulip-shaped leaves. Its spreading canopy makes this a good shade or ornamental tree. The Tuliptree likes direct sun for at least 6 hours a day. Typically, it likes normal moisture but can tolerate drought in humid regions. 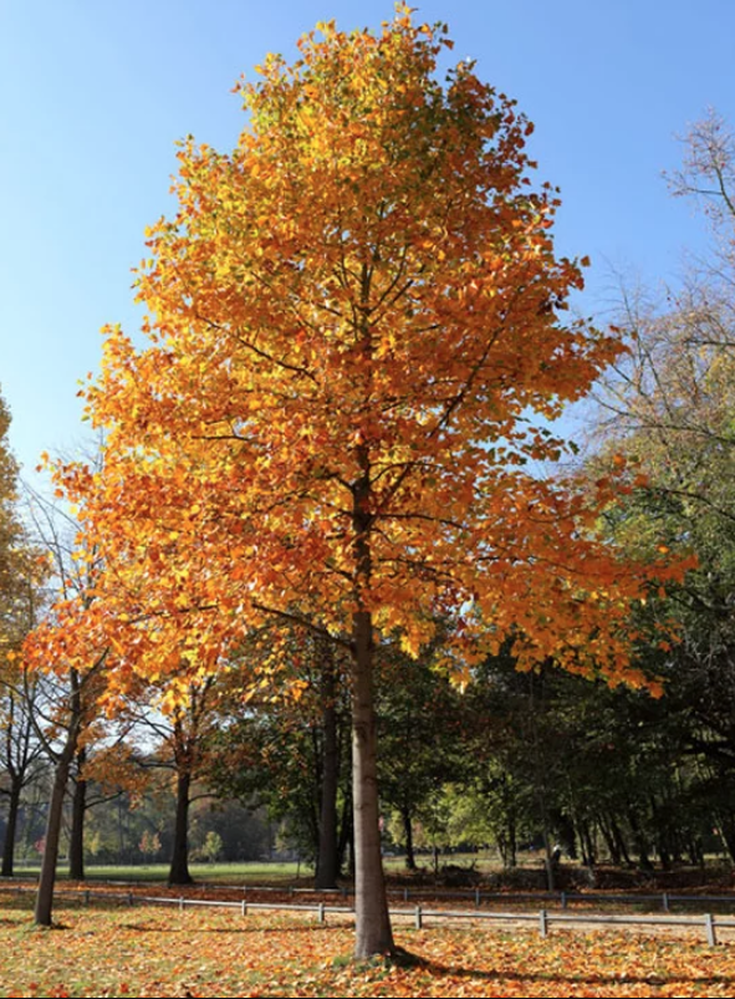 Red Maple – Zone 3-9 The Red Maple is grown all over the U.S. because it is so tolerant of many types of soils. It is a medium to fast growing tree; growing, on average, between 13” and 24” each year. Plant your Red Maple in wet soil and full sun if you can. If you find yourself in trouble do not worry the maple is a hardy tree and does have a slight drought tolerance that can protect your hard work. 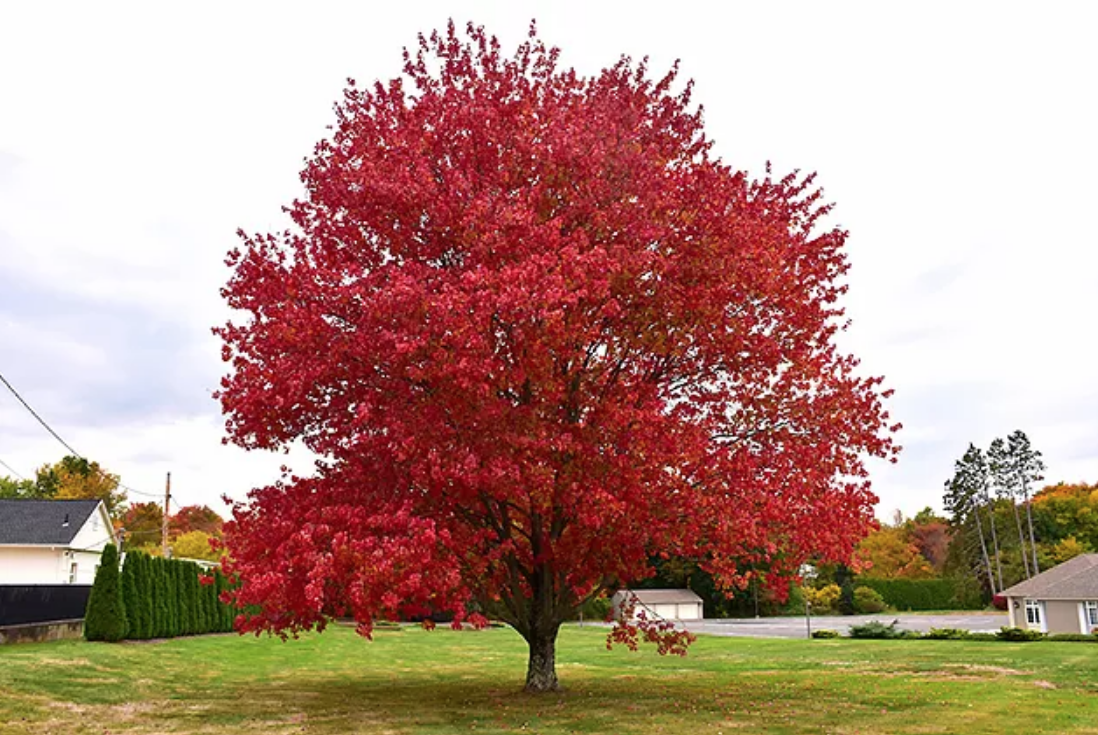 Throwing away your rotting pumpkin after Halloween can make for an unpleasant experience. The smell alone makes you second guess carving pumpkins next year, thankfully we all tend to forget about our conviction when it comes time to decorate next year. I mean, we all love fall decorations. So what if there is a better, and more beneficial, way to get rid of your old pumpkin? Composting is the thing for you. Before we get into a step by step for how to best compost your old pumpkin. Pumpkin planters are a cool way to decorate your home for the fall.  Pumpkin Planters are simple, festive and can make your home, or yard, look fall and Halloween ready. Depending on where you live, plant something that could survive a frosty winter night, some succulents or pansies. If you would like to make a Pumpkin Planter for yourself, here are the step by step instructions.
 Anyone who has lived here in the South knows that once you put the pumpkin outside you have a good three days before nature starts to run its course. There are precautions you can take that will increase how long the pumpkin will last. This article on Mother Nature Network details multiple ways to make your hard work last longer. Check their article out here. When Halloween is over with, or your pumpkins start to turn, now it’s time for you to try your hand at composting. If you have never tried it before no worries it is much easier than you’d think.
Writing a blog about landscaping in Late Winter/Early Spring is hard. Nothing seems to strike inspiration as our surrounding landscape seems to be dreary, dreary drab, drab. But then suddenly; you’re driving down the road or taking a walk and some big beautiful green-leafed shrub catches your eye. A shrub with flowers so big and formed so perfectly they appear fake or well, made of frosting. What shrub is this you exclaim, demanding to know what beauty we should behold here in the dead of winter of South Carolina. Such a specimen is regarded as the Camellia. Camellias come in two forms the Sasanqua or shrub form and the Japonica, small tree. Both species originated from Japan and seem to have a knack for blooming when other garden species are spent. A Sasanqua grows more wide then tall, is considered a shrub and has a smaller leaf structure and blooms from around Thanksgiving time up to January. The Japonica is considered a small tree with a larger leaf structure and most in the South Carolina area bloom from January to March. Both are fabulous but for the sake this post we’ll focus on the Japonica.  The Camellia Japonica grows about 6 to 10 feet tall and wide, though some varieties have the possibility of getting up to 20 feet. The leaves are deep evergreen that can get up to about 4 inches in length. Flower colors can be anything from white, pink, peach, red or a combination and some varieties can look almost identical to the dearly loved peonies of the North. While the Sasanqua can tolerate a partial shade/partial sun atmosphere, the Japonica needs full to partial shade to survive. Which makes it a perfect candidate for those of suffering under extreme tree canopies.
Japonicas are very slow growers and take quite a while to get established. They require constantly moist soil and the lack of water provided to them in the summer will result in less blooms for you during their prime season. Once established they have very few pests/problems and can handle more sun. I will warn you that if you’re shopping for a Japonica be ready to pay more than expected. Because of their slow growth habit, I probably wouldn’t suggest purchasing/planting anything below a 7-gallon specimen (2-4ft tall) and because they’ve taken so long to reach this height at a nursery they won’t be cheap. But boy oh boy are they ever worth it, once you plant it as a specimen in your garden, you won’t live to regret it…scout’s honor.
It is important to resist the temptation to immediately hack everything in sight before winter’s arrival. By doing so you can potentially cause more harm than good. Here are a few common mistakes I’ve seen around town…please don’t be a victim.
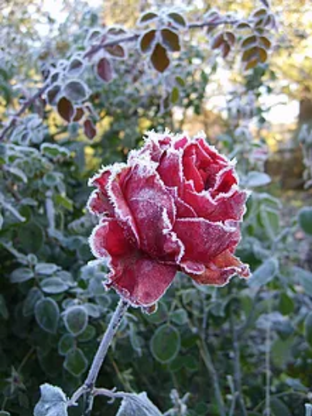
Roses – Roses bloom on new wood, aka they flourish with fresh new growth and blooms after being trimmed. They’re a rare species of plant that respond well to what feels like “murder by garden shears.” Trimming them significantly before the first of the year is no bueno. You can shape or take off a couple of inches to make tidy but that is all. Roses, especially the Knockout or Drift should be cut down to ½ or 1/3 of their starting height mid-February. I remember February 14th / Valentine’s Day as a rule of them. Cool kids get roses or some kids cut ‘em back. Ornamental Grasses – Really, truly and honestly speaking; ornamental grasses can be given their standard issue buzz cut anytime late fall – early spring. I’m not such a big fan the “hacked” look and prefer to minimized their time spent looking this way by trimming in early spring. Though the choice is left unto you, I do recommend any specimen’s in your care that seem to be struggling or are/have been recently plagued with a fungus to cut them down in the fall. Azaleas – It’s too late folks, don’t do it, you missed your window of opportunity. Trim them now and say adios to any flowers you thought about having in the spring. In all actuality, you probably will still have a few if you decide to trim now but these beauties won’t be the spectacle they could’ve been. Evergreen Shrubs that Do Not Flower – Anytime my friends, anytime Crape Myrtles – Don’t trim now, must be done between January and March 1 Spring Bulbs – If you just planted these babies this fall, be sure to provide accurate cover/mulch to protect them from potential frost damage Palms & Tropicals – If you own a Sago or other tropical plants shown to grow in Zone 9, please either have your covers ready for when frost is in the forecast or be prepared to trim brown fronds off. Another option is to bring them inside the garage or porch if they are in pots. New Plantings - If you have a money tree then by all means, go ahead plant now. Plants are shocked just by moving from pot to ground, but let’s go ahead and add a frost threat and see what happens. I’d suggest waiting until after the first of March to plant. Existing Plantings – Make sure there is enough mulch/straw around the base of each plant and that all roots are covered. Perennials – Some get trimmed now and some get trimmed in Spring a few common varieties to prune now include: Daylilies, Salvia, Phlox and Black-Eyed Susan’s. Irrigation – Turn your watering systems off and shut off the backflow. Also, be sure to cover the backflow, a $50-75 cover is a heck of a lot cheaper than a $300 fix on a backflow.  In the landscape business of Plant Zone 8b of sunny Charleston, South Carolina most of my clients believe it or not are transplants. The most common mistakes made by plant lovers new to the area have to do with underestimating the sun and the heat. And how do we battle the heat here in Charleston, South Carolina…. water. We beat the heat on the beach of the Atlantic Ocean, floating down the Edisto, in the water of the beer at Shem Creek or gigging frogs in the swamps of the Low Country. We cannot live without water and unless you are a Xeriscaper, neither can your plants.
Plants planted downhill or at a lower grade than the lawn, house or other plants will receive more water due to surface runoff than those on top of a hill.Plants suited for our zone do pretty well in the constant high humidity.It is when there is a significant increase in the fluctuation between low to high humidity levels that I feel their needs to be more water applied to plant material. It is up to you to pay attention to your landscape and determine if it needs more or less water. Using the above factors will help you when starting to figure out set minutes and frequency, every landscape is different, because every location has a different sun orientation, existing elements to contend with and so on and so forth. Have you found a watering schedule that works great for you? Share and help a fellow transplant. Too much and not enough, for some of us that is the story of our lives…and dang it all when we get it just right? Your plants may be wondering the same thing; shall we see?  1) How to water, that is the question? Distinguishing between over-watered and under-watered can be difficult as in symptoms of either tend to be similar. Optimal plant growth comes from the porridge being “just right,” as in not too much water, not too little water but just the right amount. In both cases plants will appear droopy, wilty even. There is also a possibility of leaf discoloration – if either the leaves are turning yellow and dropping and/or have already turned brown starting at the tips/edges. Please do not confuse yellowing leaves with leaves that are turning a lighter shade of green; this in most cases signifies an iron deficiency, a topic we’ll cover at a later date. All of the afore mentioned symptoms mean the plant is stressed and the only way to tell if it is too much water or not enough is to in fact put your finger in the dirt. If the soil surrounding the root ball is moist then the poor thing is receiving too much water, if it is bone dry…then obviously not enough. The soil test only holds true if the soil was amended upon planting and/or the hole for the plant was dug correctly.
2) The ‘Soup Bowl’ Effect. A landscape planted correctly will have soil amendments to help break up the terrible clay or multitudes of sand here. Let us say for example you are planting in solid clay, the backfill from which the foundation of your house was dug, tierra el diablo. You’d be hard-strapped to find a plant that thrives in this stuff I promise and for many reasons. First off, it holds very little nutrients that plants require to thrive and secondly it is so thick and compact that it is nearly impossible for the fragile roots of a young plant to penetrate. When landscaping in this kind of earth it is essential that the soil is amended either via topsoil, compost, small amounts of sand…you know the good stuff. It is also essential to install the plant material in this type of earth roughly 2” above grade and in a hole twice the width of the root ball. If the above three things are not done, you my friends will have the ‘Soup Bowl’ Effect. We all know that here in South Carolina it never showers lightly, it’s never a slight sprinkle; it is either a monsoon, a downpour or nada. The surface rainwater has difficulty penetrating solid clay and will always follow the path of least resistance. If you’ve planted in it, you loosened the soil in the hole of which your newly installed shrub/perennial/tree is housed. Where do you think that water is going to go? The hole you just dug for your plant fills up with water that can’t drain anywhere else (because it is hard clay) thus causing your plant to stress and eventually succumb to root rot. This is the only case in which testing the soil of a stressed plant at the top of the root ball will prove faulty. The water issue is underground, in the hole dug for the shrub and exists because improper site preparations. This issue will also hold true if plants were installed incorrectly and the drip system is on longer than it should be. Home improvements, landscaping included, take money and energy. And unless you have a Money Tree and a Minion hiding in your backyard, I’m willing to bet you don’t want to have to do things twice and or have to replace dead shrubbery. Horror stories anyone?  In the landscape business of Plant Zone 8b of sunny Charleston, South Carolina most of my clients, believe it or not, are transplants.
Transplant, in all its verbal glory, by definition means to move from one place to another; be it a plant, an organ or a family. I myself cannot claim to be a native as I also hail from the northern territory. But to be honest, good ol’ fashioned southern hospitality has made it hard to remember where the definitive line must be drawn of my former Yankee self and my new ‘Southern Business Owner’ identity. People are an accumulation of their total life experiences which is especially beneficial when speaking plant. Experiencing life in various geographical plant zones allows me to be an asset for you, my fellow transplant. Most have yet come to understand the climate’s role in the life of their landscape here in South Carolina. I would say that the most common mistakes made by plant lovers new to the area have to do with underestimating the sun and the heat. Here are a few nuggets of information to get you started:
Any plant varieties you have questions about? |
AuthorJess Carlin 
Archives
February 2018
|
 RSS Feed
|
Website Designed by Creative Consulting
|
Site powered by MadeSimply
|